Android CameraX で撮影した画像をピンチ操作で拡大縮小
朝の散歩です。最近は変化がまったくないので柴犬も不思議そうな思い出見ています。
概要
撮った写真の確認して NAS に保存するか決めるようにしたほうがいいので確認画面を作ることにしました。
撮影前の拡大はできるようになりましたので、確認のときも2本指によるピンチ操作による拡大・縮小ができるように考えてみました。
また、2本指による画像の移動ができるようにすることもいっしょに考えてみました。
なんとかできるようになりましたので記録することにします。
3年前の1万円タブレットで動かしてみましたが移動拡大縮小が意外とスムーズで驚きました。
1冊だけでは理解の助けにはならないので買い足しました。

2024年2月26日現在
WEBのみでは断片的で覚えにくいので最初に購入した Kotlin の本です。

Custom View クラスの作成
Custom View クラスの作成を作成します。
ピンチ操作時の動き感知するリスナーの作成をします。これには SimpleOnScaleGestureListener を使います。
2本指スクロールの動き感知するリスナーの作成をします。これには SimpleOnGestureListener を使います。
あと、再描画に必要な関数、描画するビットマップ画像をセットする関数を作成しています。
SimpleOnScaleGestureListener
    private ScaleGestureDetector.SimpleOnScaleGestureListener scalegesturelistener = new ScaleGestureDetector.SimpleOnScaleGestureListener() {

        @Override
        public boolean onScaleBegin(ScaleGestureDetector detector) {
            // ピンチ操作開始
            // タッチした座標を取得
            return true;
        }

        @Override
        public boolean onScale(ScaleGestureDetector detector) {
            // ピンチ操作中呼ばれる
            // 比率を計算
            invalidate()
            super.onScale(detector);
            return true;
        }

        @Override
        public void onScaleEnd(ScaleGestureDetector detector) {
            // ピンチ操作終了
            super.onScaleEnd(detector);
        }

    };
SimpleOnGestureListener
    private GestureDetector.SimpleOnGestureListener simpleongestureListener = new GestureDetector.SimpleOnGestureListener() {

        @Override
        public boolean onScroll (MotionEvent e1, MotionEvent e2, float distanceX, float distanceY) {
            // スクロールしたとき
            invalidate()
            super.onScroll(e1, e2, distanceX, distanceY);
            return true;
        }

        @Override
        public boolean onDoubleTap (MotionEvent e) {
            // ダブルタッチしたとき
            invalidate()
            super.onDoubleTap(e);
            return;
        }
    };
コンストラクタ
    public GestureView (Context context) {
        super(context);
        this.context = context;
        init();
    }

    public GestureView (Context context, AttributeSet attrs) {
        super(context, attrs);
        this.context = context;
        init();
    }

    public GestureView (Context context, AttributeSet attrs, int defStyleAttr) {
        super(context, attrs, defStyleAttr);
        this.context = context;
        init();
    }
GestureView.java
Custom View クラスの名前を GestureView とします。クラスの概要は次の通りです。
package org.sibainu.relax.room.scalegesturedetector;

public class GestureView extends View {

    private ScaleGestureDetector.SimpleOnScaleGestureListener scalegesturelistener = new ScaleGestureDetector.SimpleOnScaleGestureListener() {
        @Override
        public boolean onScaleBegin(ScaleGestureDetector detector)

        @Override
        public void onScaleEnd(ScaleGestureDetector detector)

        @Override
        public boolean onScale(ScaleGestureDetector detector)
    };

    private GestureDetector.SimpleOnGestureListener simpleongesturelistener = new GestureDetector.SimpleOnGestureListener() {
        @Override
        public boolean onScroll (MotionEvent e1, MotionEvent e2, float distanceX, float distanceY)

        @Override
        public boolean onDoubleTap (MotionEvent e)
    };

    // コンストラクタ
    public GestureView (Context context)

    public GestureView (Context context, AttributeSet attrs)

    public GestureView (Context context, AttributeSet attrs, int defStyleAttr)

    // このコールバックが true にならないとリスナーが働きません
    @Override
    public boolean onTouchEvent (MotionEvent event)

    // Canvas クリアーして再描画
    @Override
    protected void onDraw(Canvas canvas)

    // このクラスを実体化した時に表示するビットマップをセットします
    public void setImageBitmap(Bitmap bm)

}
次のHPのWEBで説明がありますが、必ず onTouchEvent を呼び出す必要があります。
https://developer.android.com/reference/android/view/ScaleGestureDetector実際の GestureView.java
package org.sibainu.relax.room.scalegesturedetector;

import android.content.Context;
import android.graphics.Bitmap;
import android.graphics.Canvas;
import android.graphics.Matrix;
import android.graphics.Paint;
import android.util.AttributeSet;
import android.util.Log;
import android.view.GestureDetector;
import android.view.MotionEvent;
import android.view.ScaleGestureDetector;
import android.view.View;

public class GestureView extends View {

    private Context context;
    //表示するビットマップ画像
    private Bitmap _bm;
    //ピンチ操作開始のX座標
    private float _focusx;
    //ピンチ操作開始のY座標
    private float _focusy;
    //画像の縮尺
    private float _lastscalefactor = 1.0f;
    //画像の描画を設定するオブジェクト
    private Matrix drawmatrix = new Matrix();
    //Paintオブジェクト
    private Paint paint = new Paint();
    //ピンチ操作時の動き感知するリスナーの作成します
    private ScaleGestureDetector scalegesturedetector;
    private ScaleGestureDetector.SimpleOnScaleGestureListener scalegesturelistener =
            new ScaleGestureDetector.SimpleOnScaleGestureListener() {
        @Override
        public boolean onScaleBegin(ScaleGestureDetector detector) {
            Log.d("scale","onscalebegin");
            //ピンチ操作開始
            //開始ジェスチャの焦点の XY 座標を取得します
            _focusx = detector.getFocusX();
            _focusy = detector.getFocusY();
            return super.onScaleBegin(detector);
        }

        @Override
        public void onScaleEnd(ScaleGestureDetector detector) {
            //ピンチ操作終了
            super.onScaleEnd(detector);
        }

        @Override
        public boolean onScale(ScaleGestureDetector detector) {
            //ピンチ操作中
            //縮尺を取得します
            _lastscalefactor = detector.getScaleFactor();
            //縦横の拡大縮小を設定するマトリックスの作成します
            drawmatrix.postScale(_lastscalefactor,
                                 _lastscalefactor,
                                 _focusx,
                                 _focusy);
            //これを実行することにより onDraw が発火します
            invalidate();
            super.onScale(detector);
            return true;
        }
    };
    //2本指スクロールの動き感知するリスナーの作成します
    private GestureDetector gesturedetector;
    private GestureDetector.SimpleOnGestureListener gesturelistener =
            new GestureDetector.SimpleOnGestureListener() {
        @Override
        public boolean onScroll (MotionEvent e1,
                                 MotionEvent e2,
                                 float distanceX,
                                 float distanceY) {
            Log.d("scroll","onscroll");
            // スクロールしたとき処理です
            if (e1.getPointerId(0) ==
                    e2.getPointerId(0)) {
                // 画像を移動
                drawmatrix.postTranslate(-distanceX, -distanceY);
                //これを実行することにより onDraw が発火します
                invalidate();
            }
            return super.onScroll(e1, e2, distanceX, distanceY);
        }

        // ダブルタップすると初期に戻ります
        @Override
        public boolean onDoubleTap (MotionEvent e) {
            Log.d("doubletap","onDoubleTap");
            drawmatrix.reset();
            invalidate();
            return super.onDoubleTap(e);
        }
    };
    // コンストラクタ
    public GestureView (Context context) {
        super(context);
        this.context = context;
        init();
    }

    public GestureView (Context context, AttributeSet attrs) {
        super(context, attrs);
        this.context = context;
        init();
    }

    public GestureView (Context context, AttributeSet attrs, int defStyleAttr) {
        super(context, attrs, defStyleAttr);
        this.context = context;
        init();
    }

    private void init () {
        //リスナーを組み込みます
        scalegesturedetector = new ScaleGestureDetector(context, scalegesturelistener);
        gesturedetector = new GestureDetector(context, gesturelistener);
    }

    //必ず呼び出しが必要です
    @Override
    public boolean onTouchEvent (MotionEvent event) {
        super.onTouchEvent(event);
        // Gestureの挙動はここを通ります
        Log.d("touchevent",String.valueOf(gesturedetector.onTouchEvent(event)));
        return scalegesturedetector.onTouchEvent(event) ||
               gesturedetector.onTouchEvent(event) ||
               super.onTouchEvent(event);
    }

    //この実行は invalidate() の実行で行われます
    @Override
    protected void onDraw(Canvas canvas) {
        // drawmatrixを適応して移動・拡大縮小します
        canvas.save();
        canvas.drawBitmap(_bm, drawmatrix, paint);
        canvas.restore();
    }

    public void setImageBitmap(Bitmap bm) {
        _bm = bm;
        //これを実行することにより onDraw が発火します
        invalidate();
    }
}
ImageCheckActivity.java
カメラ MainActivity の撮影した画像を確認する Activity です。これは MainActivity から画像の Uri の文字列をパラメータにして遷移して開く Activity です。対になるタブレット画面のレイアウトは activity_check_image.xml です。
copy
package org.sibainu.relax.room.scalegesturedetector;

import androidx.appcompat.app.AppCompatActivity;

import android.content.ContentResolver;
import android.content.Intent;
import android.graphics.Bitmap;
import android.graphics.BitmapFactory;
import android.net.Uri;
import android.os.Bundle;
import android.util.Log;
import android.view.View;
import android.widget.Button;

import java.io.InputStream;

public class ImageCheckActivity extends AppCompatActivity {

    GestureView gv;
    Button bt;
    TextView tvinfo2;
    TextView tv_info;

    @Override
    protected void onCreate(Bundle savedInstanceState) {
        super.onCreate(savedInstanceState);
        setContentView(R.layout.activity_image_check);

        // clickリスナークラスをセットします
        ImageCheckActivity.clickListener ls = new ImageCheckActivity.clickListener();
        bt = findViewById(R.id.bt_end);
        bt.setOnClickListener(ls);

        tv_info = findViewById(R.id.tv_info);
        tv_info.setOnClickListener(ls);

        tvinfo2 = findViewById(R.id.tvinfo2);

        // 呼び出し元の Activity から Uri を取得します
        Intent intent = getIntent();
        String uristr = intent.getStringExtra("uri").toString();
        Uri uri = Uri.parse(uristr);

        // ストリームからビットマップイメージを作成します
        ContentResolver resolver = getContentResolver();
        try {
            // Uri からストリームを取得します
            InputStream ips = resolver.openInputStream(uri);

            // ビットマップイメージを作成します
            final int SCALE = 1;
            BitmapFactory.Options imageOptions = new BitmapFactory.Options();
            imageOptions.inSampleSize = SCALE;
            Bitmap bm = BitmapFactory.decodeStream(ips, null, imageOptions);

            // Custom View クラスを実体化します
            gv = new GestureView(this);

            // 作成したビットマップを表示
            gv = findViewById(R.id.cv_gestureview);
            gv.setImageBitmap(bm);

        } catch (Exception e) {
            Log.d("ImageCheckActivity","");
        }
    }

    // clickリスナークラスを作成します
    private class clickListener implements View.OnClickListener {
        @Override
        public void onClick(View view) {
            int id = view.getId();
            if (id == R.id.bt_end) {
                finish();
            } else if (id == R.id.tv_info) {
                String str = tv_info.getText().toString();
                tvinfo2.setText(str);
            }
        }
    }
}
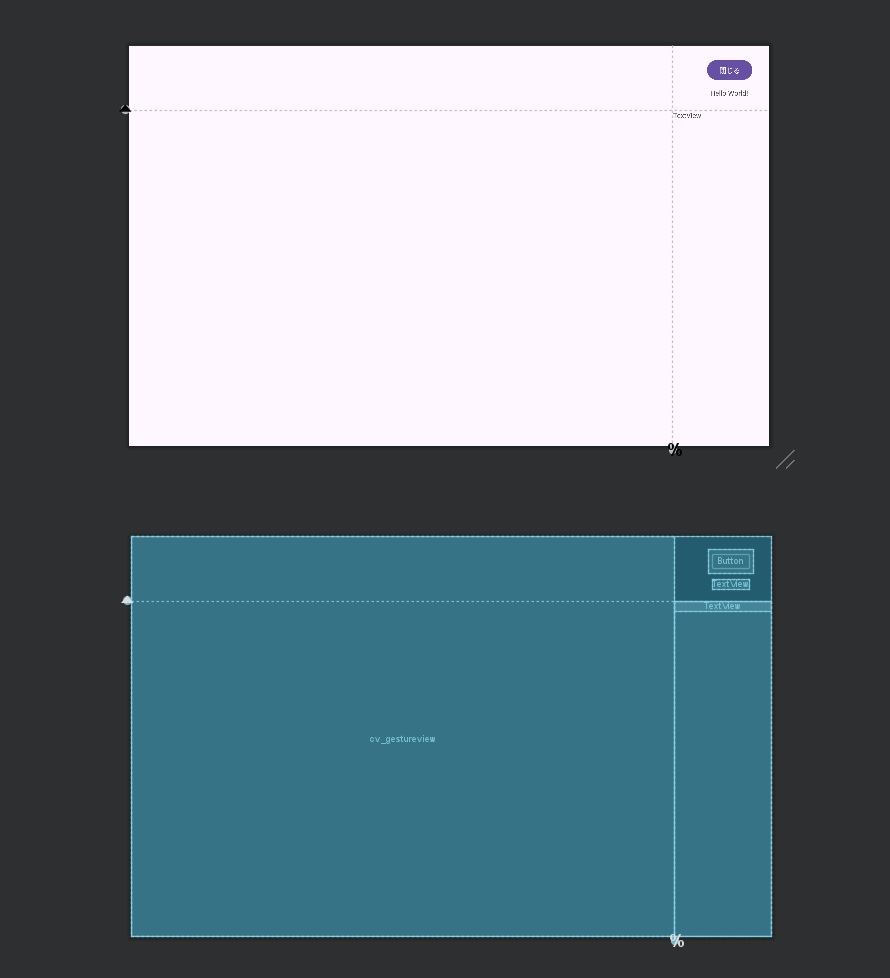
res/layout/activity_image_check.xml
タグの名称に Custom View の名前空間を加えたクラス名を書きます。これだけで Custom View が使えます。
    <org.sibainu.relax.room.scalegesturedetector.GestureView
        android:id="@+id/cv_gestureview"
        android:layout_width="0dp"
        android:layout_height="0dp"
        app:layout_constraintBottom_toBottomOf="parent"
        app:layout_constraintEnd_toEndOf="@+id/guideline4"
        app:layout_constraintHorizontal_bias="0.379"
        app:layout_constraintStart_toStartOf="parent"
        app:layout_constraintTop_toTopOf="parent"
        app:layout_constraintVertical_bias="0.2" />
TextView “@+id/tv_info” に onClick アクションができるようにします。次のコードを挿入します。
android:clickable="true"このようにします。
    <TextView
        android:id="@+id/tv_info"
        android:layout_width="wrap_content"
        android:layout_height="wrap_content"
        android:layout_marginTop="12dp"
        android:text="Hello World!"
        android:clickable="true"
        app:layout_constraintEnd_toEndOf="parent"
        app:layout_constraintHorizontal_bias="0.641"
        app:layout_constraintStart_toStartOf="@+id/guideline4"
app:layout_constraintTop_toBottomOf="@+id/bt_end" /><?xml version="1.0" encoding="utf-8"?>
<androidx.constraintlayout.widget.ConstraintLayout
xmlns:android="http://schemas.android.com/apk/res/android"
xmlns:app="http://schemas.android.com/apk/res-auto"
xmlns:tools="http://schemas.android.com/tools"
android:layout_width="match_parent"
android:layout_height="match_parent"
tools:context=".ImageCheckActivity">
<Button
android:id="@+id/bt_end"
android:layout_width="wrap_content"
android:layout_height="wrap_content"
android:layout_marginTop="24dp"
android:text="@string/bt_end"
app:layout_constraintBottom_toTopOf="@+id/tv_info"
app:layout_constraintEnd_toEndOf="parent"
app:layout_constraintHorizontal_bias="0.673"
app:layout_constraintStart_toEndOf="@+id/cv_gestureview"
app:layout_constraintTop_toTopOf="parent" />
<TextView
android:id="@+id/tv_info"
android:layout_width="wrap_content"
android:layout_height="wrap_content"
android:layout_marginTop="12dp"
android:text="Hello World!"
android:clickable="true"
app:layout_constraintEnd_toEndOf="parent"
app:layout_constraintHorizontal_bias="0.641"
app:layout_constraintStart_toStartOf="@+id/guideline4"
app:layout_constraintTop_toBottomOf="@+id/bt_end" />
<ScrollView
android:id="@+id/scrollView3"
android:layout_width="0dp"
android:layout_height="0dp"
app:layout_constraintBottom_toBottomOf="parent"
app:layout_constraintEnd_toEndOf="parent"
app:layout_constraintHorizontal_bias="1.0"
app:layout_constraintStart_toStartOf="@+id/guideline4"
app:layout_constraintTop_toTopOf="@+id/guideline5"
app:layout_constraintVertical_bias="1.0">
<TextView
android:id="@+id/tvinfo2"
android:layout_width="match_parent"
android:layout_height="wrap_content"
android:text="TextView" />
</ScrollView>
// ここに Custom View の名前空間を加えたクラス名を書きます
<org.sibainu.relax.room.scalegesturedetector.GestureView
android:id="@+id/cv_gestureview"
android:layout_width="0dp"
android:layout_height="0dp"
app:layout_constraintBottom_toBottomOf="parent"
app:layout_constraintEnd_toEndOf="@+id/guideline4"
app:layout_constraintHorizontal_bias="0.379"
app:layout_constraintStart_toStartOf="parent"
app:layout_constraintTop_toTopOf="parent"
app:layout_constraintVertical_bias="0.2" />
<androidx.constraintlayout.widget.Guideline
android:id="@+id/guideline4"
android:layout_width="wrap_content"
android:layout_height="wrap_content"
android:orientation="vertical"
app:layout_constraintGuide_percent="0.85" />
<androidx.constraintlayout.widget.Guideline
android:id="@+id/guideline5"
android:layout_width="wrap_content"
android:layout_height="wrap_content"
android:orientation="horizontal"
app:layout_constraintGuide_begin="129dp" />
</androidx.constraintlayout.widget.ConstraintLayout>
こんな感じになります。
MainActivity.java
takePhoto() 関数の中にある imagecapture.takePicture の最後に次の3行を追加して画面の遷移を行います。
Intent intent = new Intent(MainActivity.this, ImageCheckActivity.class);
intent.putExtra("uri", uristr);
startActivity(intent);imagecapture.takePicture(
outputOptions,
ContextCompat.getMainExecutor(this),
new ImageCapture.OnImageSavedCallback() {
@Override
public void onError(ImageCaptureException error) {
Log.e(TAG, "Photo capture failed: " + error.toString(), error);
}
@Override
public void onImageSaved(ImageCapture.OutputFileResults
outputFileResults) {
CharSequence msg = "Photo capture succeeded: " +
outputFileResults.getSavedUri();
Toast.makeText(MainActivity.this,
msg,
Toast.LENGTH_SHORT).show();
Log.d(TAG, msg.toString());
Uri uri = Uri.parse(outputFileResults.getSavedUri().toString());
String uristr = outputFileResults.getSavedUri().toString();
try {
Log.d(TAG, "begin try");
InputStream ips = resolver.openInputStream(uri);
Log.d(TAG, "InputStream");
if (id == R.id.bt_shutter) {
//画像のアップロードの実行
Log.d(TAG,"ftpupload");
uploadNas(FTPUSERNAME,
FTPPASSWORD,
FTPSERVER,
FTPDIRECTORY,
name + ".jpg",
ips);
} else if (id == R.id.bt_post) {
//POSTリクエストの実行(画像の文字エンコード)
Log.d(TAG,"postBody");
Map<String, String> postBody =
requestImageBody(JSONNAME,
JSONID,
JSONACCESS,
JSONKEY,
ips);
Log.d(TAG, "front : " + postBody.get("data"));
uploadJson(JSONSERVER,postBody);
}
ips.close();
} catch (Exception e) {
Log.d(TAG, "画像ファイルエラー");
}
// 追加はこの3行だけです
Intent intent = new Intent(MainActivity.this, ImageCheckActivity.class);
intent.putExtra("uri", uristr);
startActivity(intent);
}
});
manifests
遷移先の ImageCheckActivity の登録を行います。
application 部の最後に次のコードを追加しています。これで android OS に ImageCheckActivity があることを通知します。
        <activity
            android:name=".ImageCheckActivity"
            android:exported="true"
            android:screenOrientation="landscape">
            <intent-filter>
                <action android:name="android.intent.action.VIEW" />
                <category android:name="android.intent.category.LAUNCHER" />
            </intent-filter>
</activity> <application
android:allowBackup="true"
android:dataExtractionRules="@xml/data_extraction_rules"
android:fullBackupContent="@xml/backup_rules"
android:icon="@mipmap/ic_launcher"
android:label="@string/app_name"
android:roundIcon="@mipmap/ic_launcher_round"
android:supportsRtl="true"
android:theme="@style/Theme.Cameracjavanas_call1"
tools:targetApi="31">
<activity
android:name=".MainActivity"
android:exported="true"
android:screenOrientation="landscape">
<intent-filter>
<action android:name="android.intent.action.MAIN" />
<category android:name="android.intent.category.LAUNCHER" />
</intent-filter>
</activity>
<activity
android:name=".ImageCheckActivity"
android:exported="true"
android:screenOrientation="landscape">
<intent-filter>
<action android:name="android.intent.action.VIEW" />
<category android:name="android.intent.category.LAUNCHER" />
</intent-filter>
</activity>
</application>
ここまでとします。